Create event-driven applications with Cloudflare Queues and Dapr
In this post, you'll learn how to build a cloud to edge event-driven application with Dapr and Cloudflare Queues.
Marc Duiker
Developer Advocate
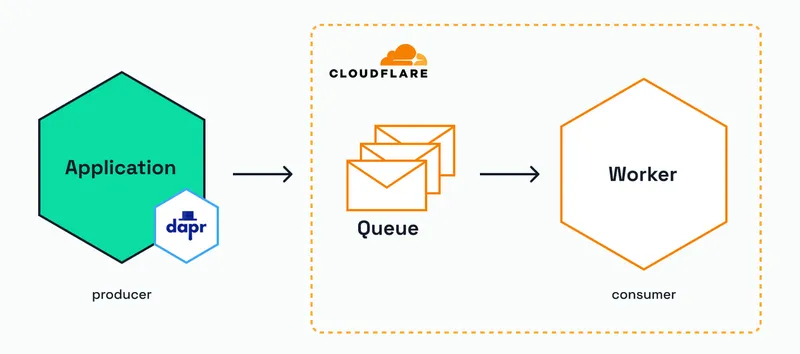
In this post, you'll learn how to build a cloud to edge event-driven application with Dapr and Cloudflare. You'll learn how to create:
- A Cloudflare queue.
- A consumer Cloudflare worker (in TypeScript) that reads messages from the queue.
- A producer Dapr app (in TypeScript) that uses the Cloudflare Queue binding to publish messages to the queue.
Event-driven applications FTW 🚀
Event-driven applications are becoming increasingly popular. The decoupling of event producers and event consumers makes applications more resilient and flexible, since they allow independent implementation and scaling of the applications.
Cloudflare recently announced Queues, allowing developers to send and receive messages with guaranteed delivery and integrating with Cloudflare Workers, a fast edge computing platform.
Dapr, the open-source distributed application runtime, is often used in event-driven applications. Dapr provides a set of standardized API building blocks that simplify microservice development. By using the Bindings building block, developers can use input, and output bindings, and either trigger their apps or invoke other resources without having to learn resource-specific SDKs for these resources. With Dapr release 1.10, a new binding is provided that allows developers to publish messages to Cloudflare Queues. Because of the common set of APIs that Dapr offers, developers from any background can use the binding to publish messages to Cloudflare Queues without needing to know the Cloudflare SDKs or adding that dependency to their codebase.
Let's start building an event-driven app and see the binding in action.
Prerequisites
The following is required to run this sample:
- Clone this repository to your local machine.
- Install Dapr CLI
- Use the Dapr CLI to install the Dapr runtime locally: dapr init
- Install Node.js
- Install Cloudflare Wrangler
- Ensure you're on a Cloudflare paid plan, since that is required to use Cloudflare queues.
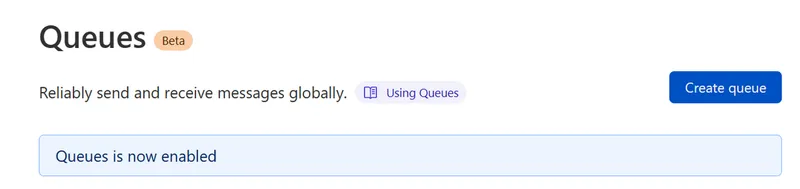
- Enable Queues in the Cloudflare dashboard.
- Dashboard > Workers > Queues
- Enable Queues Beta
- You should see a confirmation in the dashboard that queues are enabled.
Create the applications
The solution consists of three parts:
- A Cloudflare queue
- A consumer Cloudflare worker that reads messages from the queue.
- A producer Dapr app that will publish messages to the queue.
1. Create a Cloudflare queue
- Open a terminal and use the wrangler CLI to login to Cloudflare:
wrangler login
Follow the instructions in the browser to login to Cloudflare.
The response in the terminal should end with:
Successfully logged in.
2.Create the Cloudflare queue using the wrangler CLI:
wrangler queues create dapr-messagesThe response in the terminal should end with:
Created queue dapr-messages.
2. Create a consumer Cloudflare worker
You can either create a new consumer worker by following steps 1-3, or use the existing consumer worker in this repository and continue from step 4.
- In the root folder, create a worker to consume messages:
wrangler init consumer
- Create package.json:
Y - Use TypeScript:
Y - Create worker:
Fetch handler - Write tests:
N
A new folder named consumer will be created which contains the worker.
- Update the consumer/src/index.ts file to:
export default {
  async queue(batch: MessageBatch, env: Env): Promise {
    let messages = JSON.stringify(batch.messages);
    console.log(messages);
  },
};- Add the following lines to the consumer/wrangler.toml file:
[[queues.consumers]]
queue = "dapr-messages"
max_batch_size = 1- Ensure that you're in the consumer folder and install the dependencies:
cd consumer
npm install- Publish the consumer worker:
wrangler publish
The response in the terminal should end with:
Published consumer (... sec)
https://consumer..workers.dev
Consumer for dapr-messages
Current Deployment ID:
- Start a tail to read the log of the consumer worker:
wrangler tail
3. Configure the producer Dapr app
The Cloudflare Dapr binding uses a Cloudflare worker to publish messages, since only Cloudflare workers can access the queue.
There are two options for this worker:
- Dapr provisions the worker.
- You use a pre-provisioned Cloudflare worker.
This sample uses option 1. Read the Cloudflare Queues binding spec and choose Manually provision the Worker script if you want to go for option 2.
Create a binding file
- Rename the
producer/resources/binding.yaml.templatetoproducer/resources/binding.yaml. - Open the
binding.yamlfile and inspect its content.
apiVersion: dapr.io/v1alpha1
kind: Component
metadata:
  name: cloudflare-queues
spec:
  type: bindings.cloudflare.queues
  version: v1
  # Increase the initTimeout if Dapr is managing the Worker for you
  initTimeout: "120s"
  metadata:
    # Name of the existing Cloudflare Queue (required)
    - name: queueName
      value: "dapr-messages"
    # Name of the Worker (required)
    - name: workerName
      value: "dapr-message-worker"
    # PEM-encoded private Ed25519 key (required)
    - name: key
      value: |
        -----BEGIN PRIVATE KEY-----
        MC4CAQ...
        -----END PRIVATE KEY-----
    # Cloudflare account ID (required to have Dapr manage the Worker)
    - name: cfAccountID
      value: ""
    # API token for Cloudflare (required to have Dapr manage the Worker)
    - name: cfAPIToken
      value: ""
    # URL of the Worker (required if the Worker has been pre-created outside of Dapr)
    - name: workerUrl
      value: ""
The metadata.name, spec.metadata.queueName and spec.metadata.workerName values have already been set. Ensure that the queueName matches the queue setting in the consumer worker wrangler.toml file.
Values for spec.metadata.key, spec.metadata.cfAccountID, and spec.metadata.cfAPIToken still need to be provided.
-
Follow these instructions in the Dapr docs to set the value for spec.metadata.key.
-
The Cloudflare account ID should go in the
spec.metadata.cfAccountIDfield. You can find the account ID in the Cloudflare dashboard URL:https://dash.cloudflare.com/<ACCOUNT\_ID>/workers/overview. -
A Cloudflare API token should go in the
spec.metadata.cfAPITokenfield. It can be generated as follows: -
In the Cloudflare dashboard, go to the Workers page.
-
Click the API tokens link
-
Click the Create token button
-
Click the Use template button for Edit Cloudflare Workers
-
Update the permissions to only contain:_
Account_ | Worker Scripts | Edit -
Update the Account Resources to only contain:_
Include_ |<YOUR ACCOUNT> -
Set a time to live (TTL) for the token, the shorter, the better, if you're just testing.
Now the binding file is complete. The file is gitignored, so the secrets won't be committed to the repository.
Inspect the Node app
Let's have a look at the Dapr app that will send the messages to the Cloudflare queue.
- Inspect the producer/index.ts\ file.
import { DaprClient } from "@dapr/dapr";

// Common settings
const daprHost = "http://localhost";
const daprPort = process.env.DAPR_HTTP_PORT || "3500";

async function main() {
  console.log("Starting...");

  const bindingName = "cloudflare-queues";
  const bindingOperation = "publish";
  const client = new DaprClient(daprHost, daprPort);
  for (var i = 1; i <= 10; i++) {
    const message = { data: "Hello World " + i };
    const response = await client.binding.send(
      bindingName,
      bindingOperation,
      message
    );
    if (response) {
      console.log(response);
    }
    await sleep(1000);
  }

  console.log("Completed.");
}

async function sleep(ms: number) {
  return new Promise((resolve) => setTimeout(resolve, ms));
}

main().catch((e) => {
  console.error(e);
  process.exit(1);
});
Note that the `bindingName` is set to `cloudflare-queues` and matches the value of the `metadata.name` property in the `binding.yaml`. The `bindingOperation` is set to `publish` (`create` could be used as an alias).
Run the producer app
-
Open a new terminal window and navigate to the `producer` folder.
-
Run npm install to install the dependencies:
npm install- Run the following command to start the producer app:
dapr run --app-id producer --resources-path ./resources -- npm run start- The terminal that logs the tail of the consumer app should show a log statement for each of the ten messages sent:
Unknown Event - Ok @ 17/02/2023, 11:22:50
(log) [{"body":"{\"data\":\"Hello World 1.}","timestamp":"2023-02-17T10:22:50.556Z","id":"8f6293d9d04001e3f2a12be5c47acde2"}]
...
Congratulations! You've now sent messages from a Dapr app to a Cloudflare Queue (& Worker) via the Cloudflare Queues binding! 🎉 Hungry for more Dapr bindings? Have a look at the long list of supported bindings.
Any questions or comments about this blog post or the code? Join the Dapr discord and post a message in the `#components-contrib` channel. Have you made something with Cloudflare and Dapr? Post a message in the `#show-and-tell` channel, we love to see your creations!
Ready to Go to Production?
Add durable execution to your AI agents in minutes. Start free, no credit card required.